Installation
By Upload
-
Download the latest version from Marketplace
-
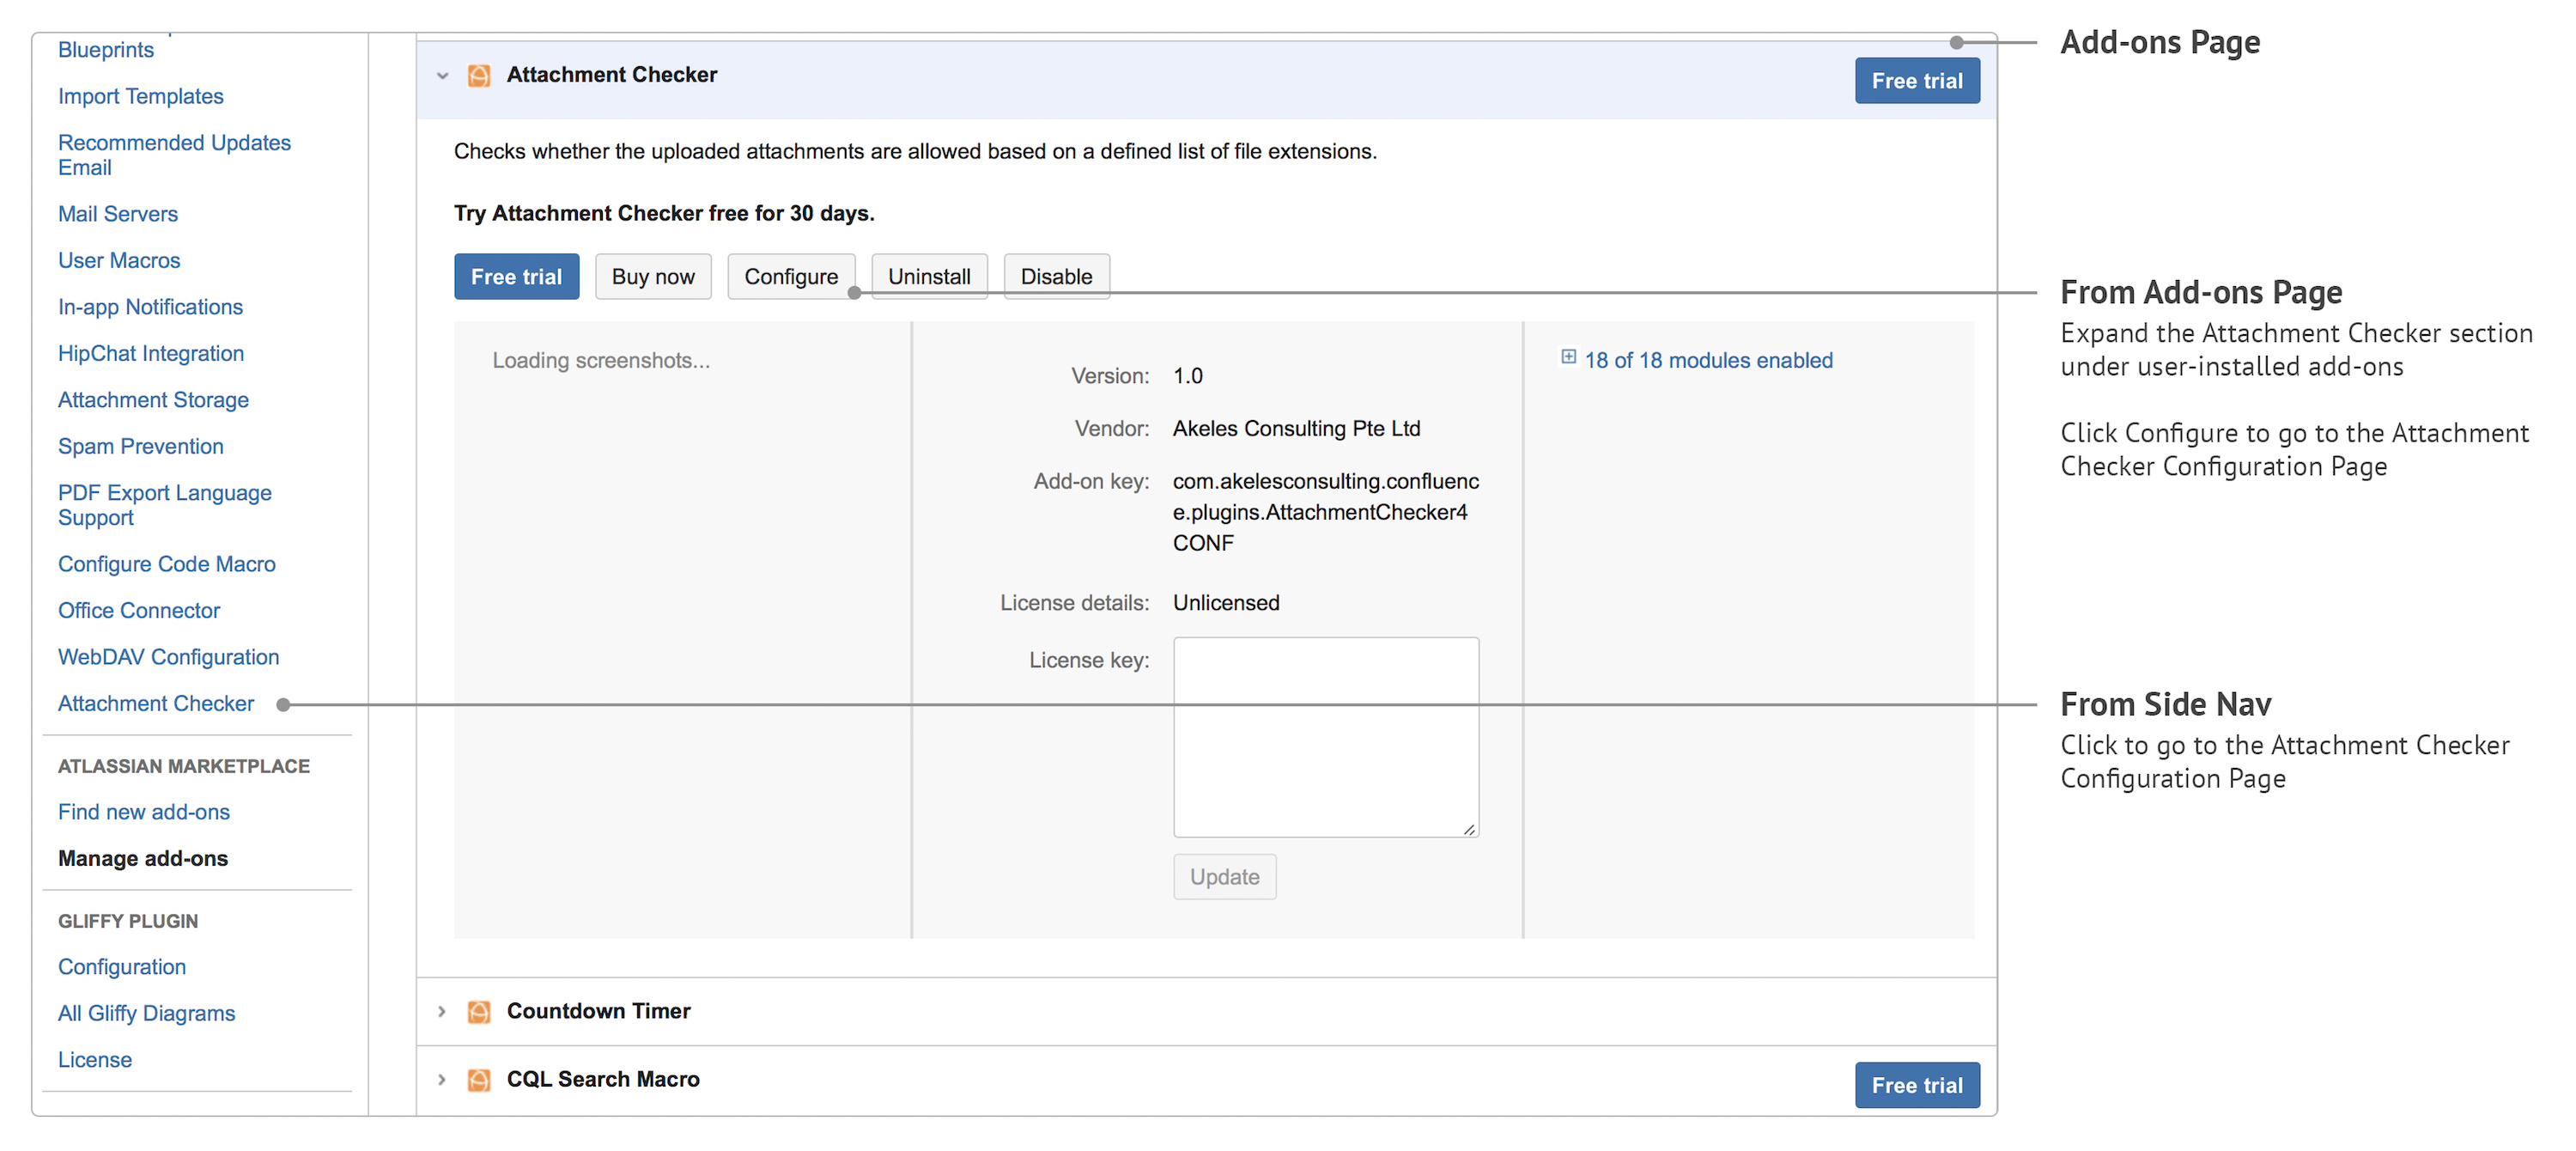
Go to Manage add-ons
-
Click on Upload add-on
-
Select the .jar file
-
Click Upload
-
The Attachment Checker should be installed
-
Click on Free trial or Buy now to configure and start using
By Searching in Atlassian Marketplace
-
Go to Find new add-ons
-
Search for Attachment Checker in the search field
-
Click Free trial or Buy now to install, configure and start using
*The Attachment Checker for Confluence offers a free trial for 30 days. Thereafter, a license key will be required in order to use it.
Configuration
Accessing the Configuration Page
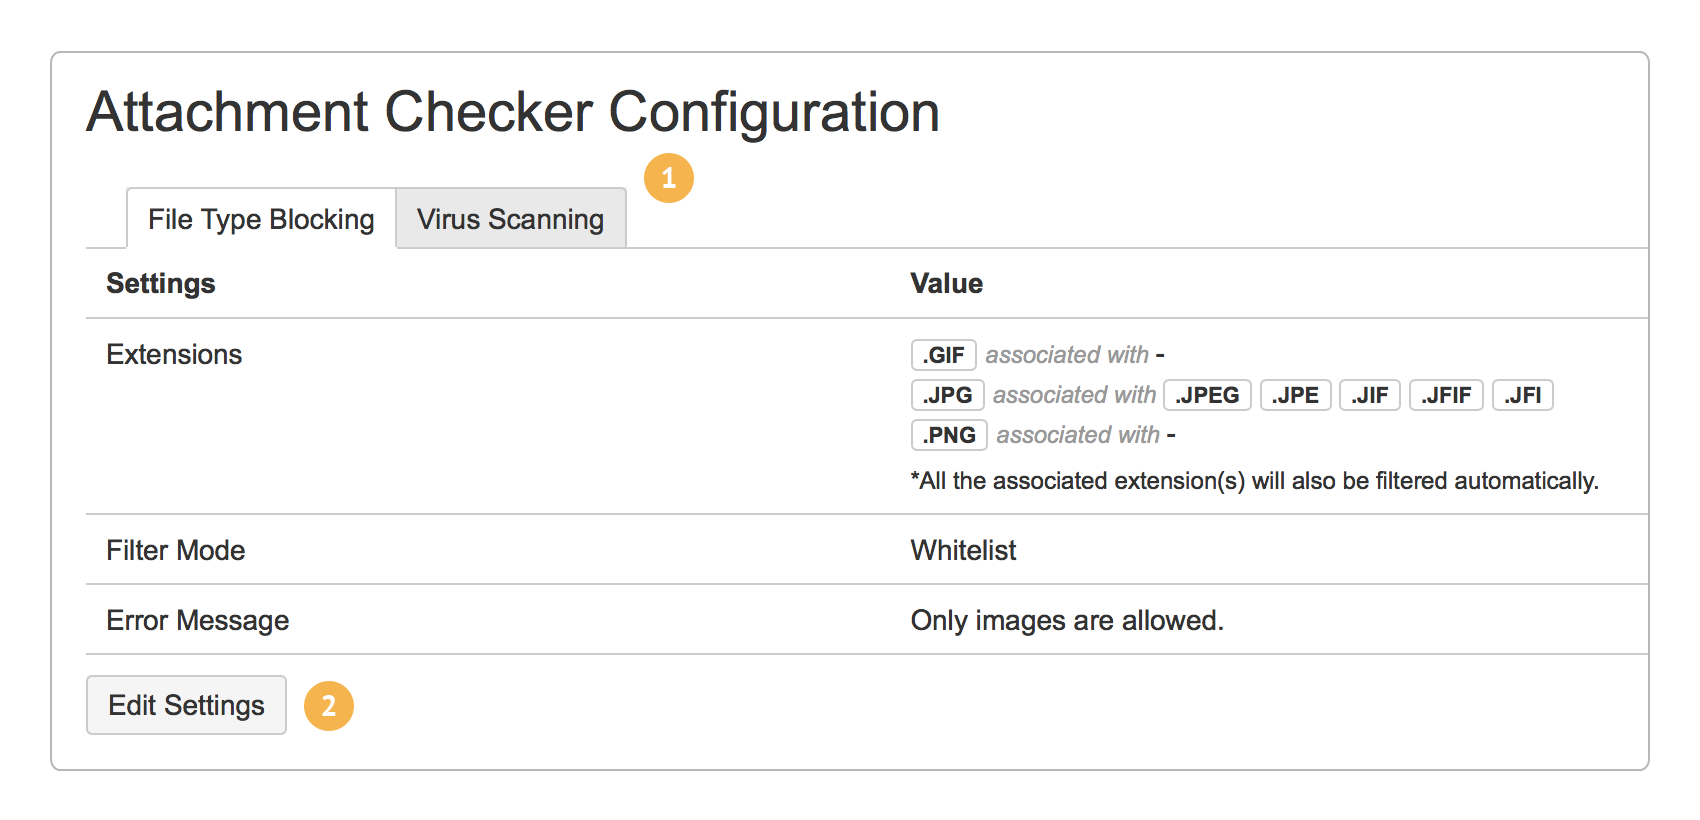
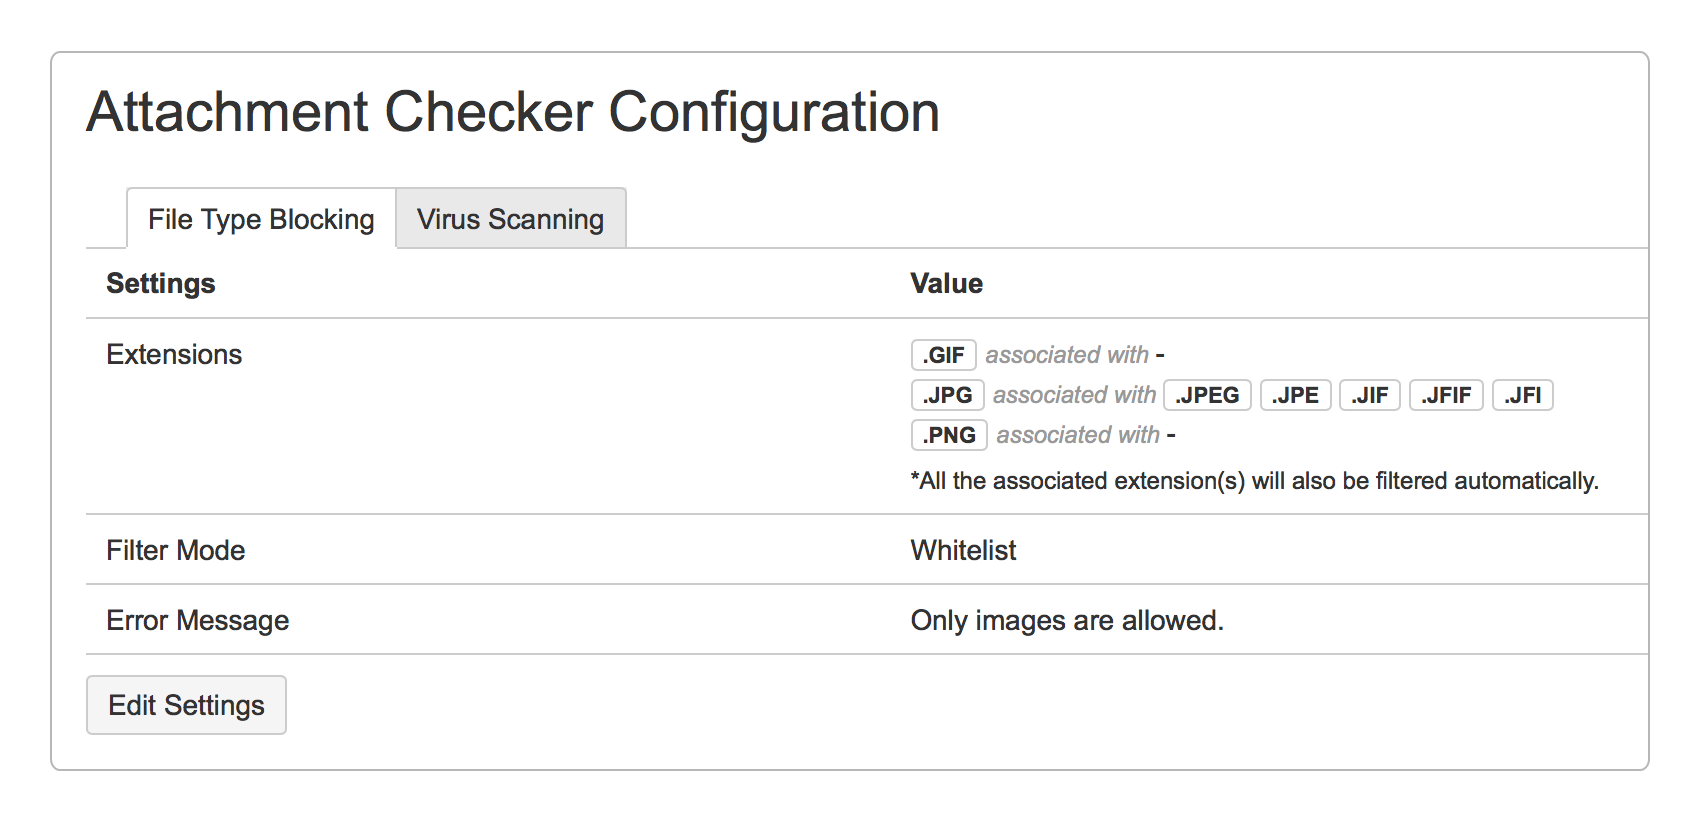
Configuration Settings
The settings are organised into the following tabs:
-
File Type Blocking
-
Virus Scanning
File Type Blocking
To block file types based on the configured whitelisting/blacklisting rules.
|
Field Name |
Required |
Default Value |
Explanation |
|---|---|---|---|
|
Extensions |
|
jpg |
The list of extensions to be used for filtering.
|
|
Filter Mode |
|
Whitelist |
Choose a filter mode:
|
|
Error Message |
|
This file type is not allowed. |
The message to be displayed when a file attached is not allowed. |
Virus Scanning
To scan all uploaded attachments for virus threats.

|
Field Name |
Required |
Default Value |
Explanation |
|---|---|---|---|
|
Virus Scanning |
|
Disabled |
Select whether to enable the scanning of attachments:
|
|
Scanner Path |
|
|
The full path to the scanner. |
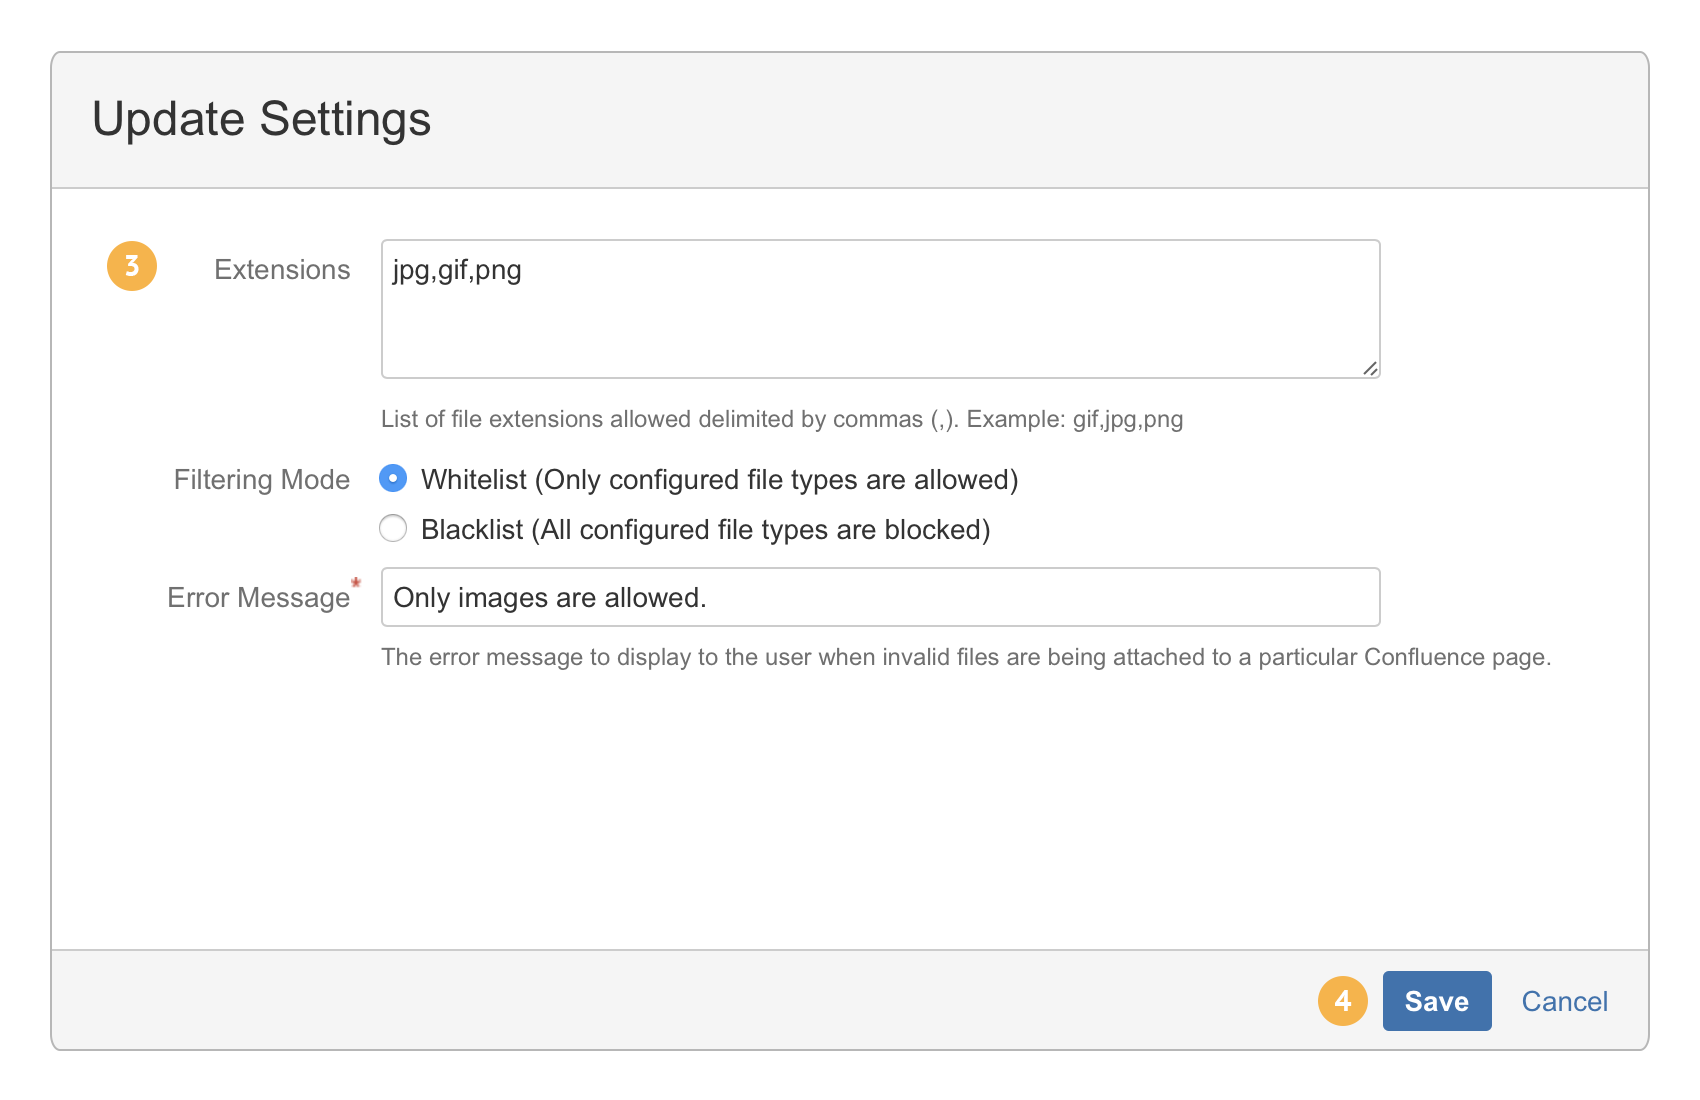
Update Settings
*Only System Administrators are allowed to update the settings.
-
Click on the tab that you wish to edit.
-
Click on the Edit Settings button.
-
Make the necessary changes to the form.
-
Click on the Save button.