Objectives
This section is to ensure the custom fields used in both projects are defined in Jira, so that it can be used in the automation.
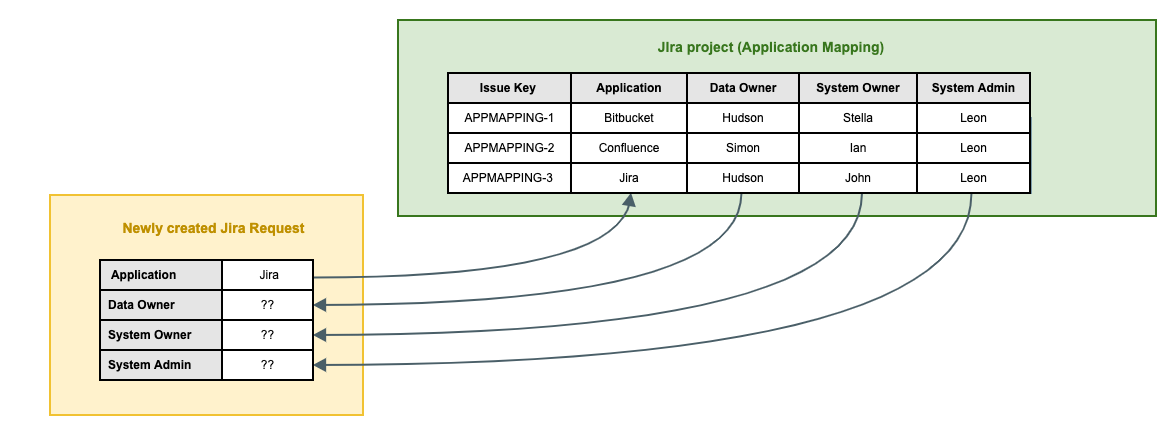
In this example, we used the same custom fields in the both projects to keep it simple. It is actually possible to have different custom fields as long they are the same type. E.g. using Data Owner to update the Assignee field.
We will need to add the following custom fields if they are not defined.
|
Custom Field Name |
Field Type |
|---|---|
|
Application |
Select List (single choice) |
|
Data Owner |
User Picker (single user) |
|
System Owner |
User Picker (single user) |
|
System Admin |
User Picker (single user) |
You can also add additional fields that are used in the Service Desk request project
|
Custom Field Name |
Field Type |
Purpose |
|---|---|---|
|
Application Role |
Select List (single choice) |
It provides whether the requester requires what level of access. The options are:
|
|
Employee User |
User Picker (single user) |
This is to facilitate team members from requesting access on behalf of a new employee |
|
Access Start Date |
Date Picker |
Denotes the effective start date of this access |
|
Planned Access End Date |
Date Picker |
The date that the account is to be revoked. Leave it blank for perpetual access. |
If there is an existing custom field with the same name, you can either
-
add a new context if the field type is matching
-
create the custom field with another name if the field type does not match
Steps
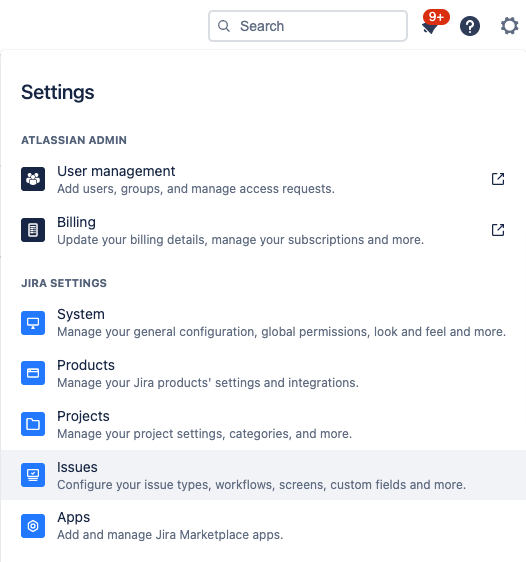
To access the custom field configuration page
-
Go to Settings > Issues
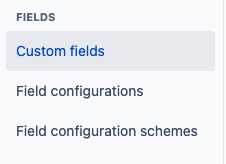
-
Select Custom fields on the left side menu
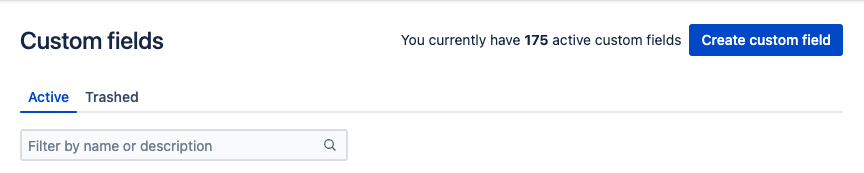
Adding the Application custom field
-
Click on Create custom field on the top right corner of the screen
-
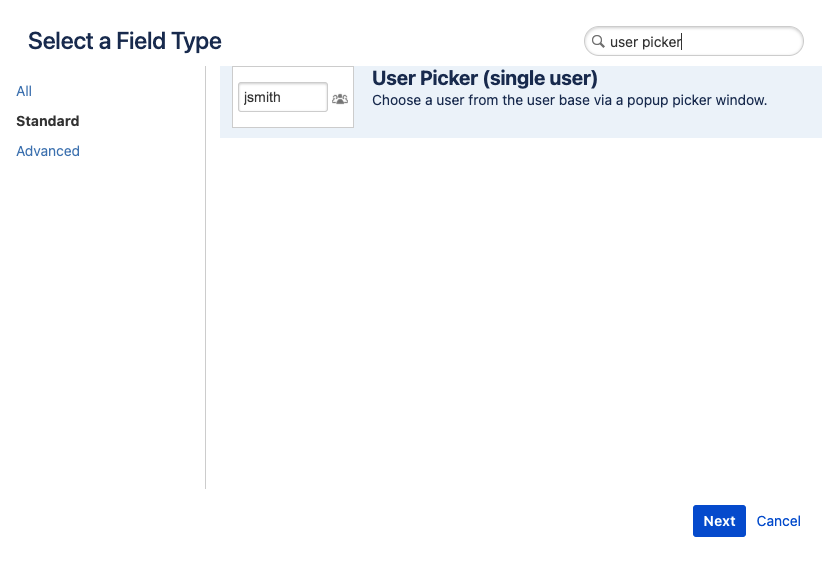
Search for the Select List (single choice) Field Type
-
Click on the Next button
.png?cb=f714f051652aa7e8588076c15386836a)
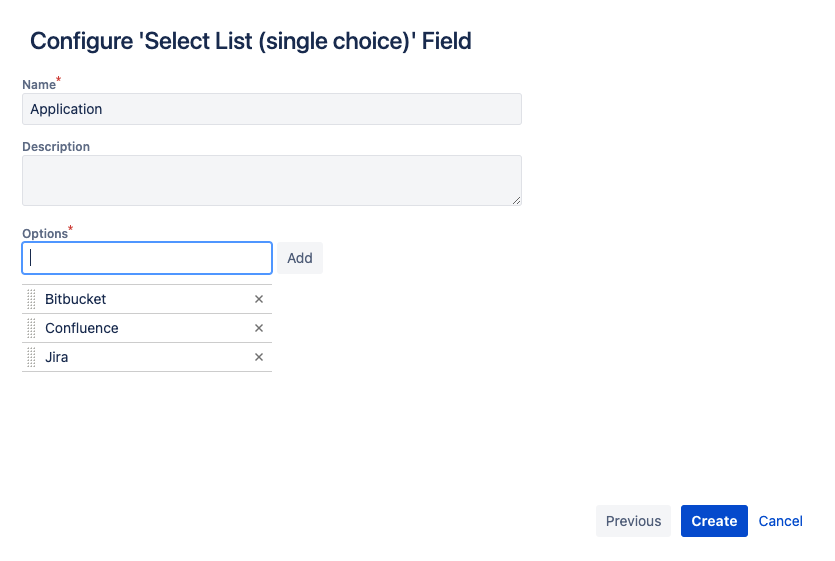
-
Enter the Name (Application) and add the options (Bitbucket, Confluence, Jira)
-
Click on the Create button
-
Click on Cancel button since we can add them to the screens later
Adding the Data Owner custom field
-
Click on Create custom field on the top right corner of the screen
-
Search for the User Picker (single user) Field Type
-
Click on the Next button
-
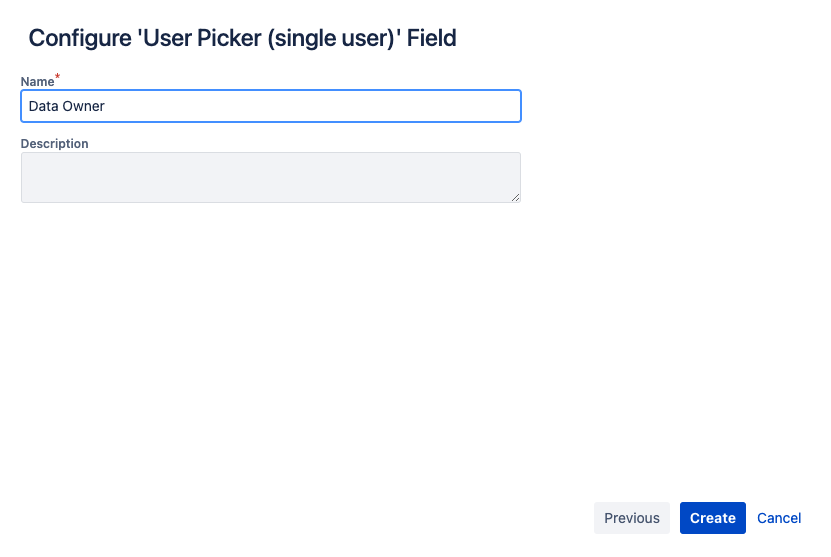
Enter the Name (Data Owner)
-
Click on the Create button
-
Click on Cancel button since we can add them to the screens later
Repeat the same for the System Owner and System Admin
Click here to see the detailed steps for the System Owner and System Admin setup
Adding the Data Owner custom field
-
Click on Create custom field on the top right corner of the screen
-
Search for the User Picker (single user) Field Type
-
Click on the Next button
-
Enter the Name (System Owner)
-
Click on the Create button
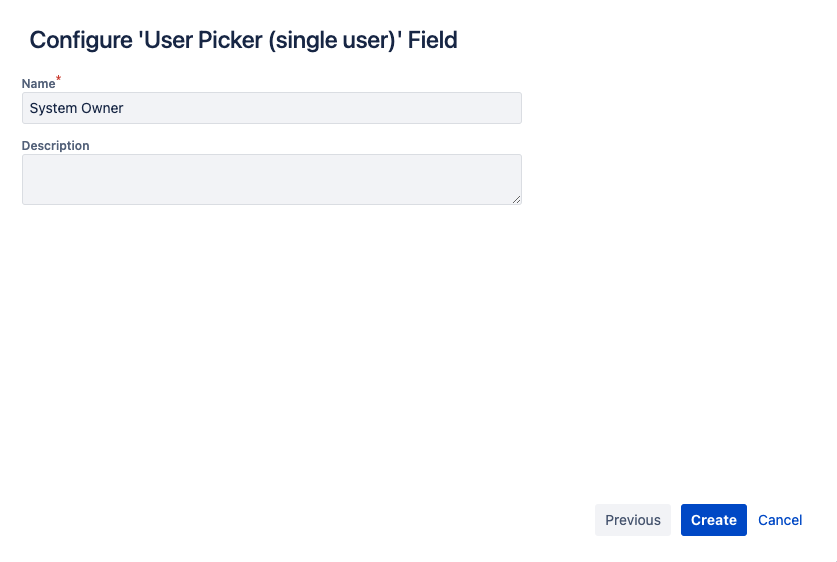
-
Click on Cancel button since we can add them to the screens later
Adding the System Admin custom field
-
Click on Create custom field on the top right corner of the screen
-
Search for the User Picker (single user) Field Type
-
Click on the Next button
-
Enter the Name (Data Owner)
-
Click on the Create button
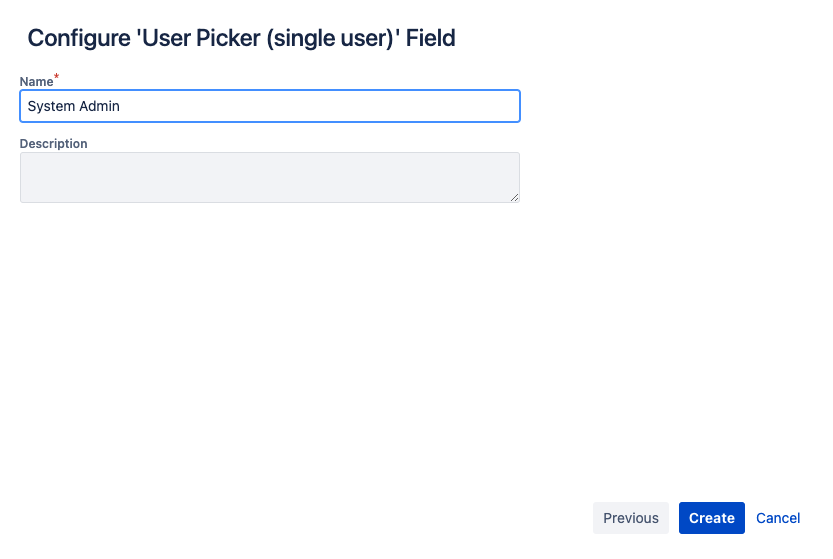
-
Click on Cancel button since we can add them to the screens later
Next
For good Jira admin practices, you can configure custom field context to limit the scope of the projects. This is excluded to keep this tutorial simple.
Now you are ready to proceed to the next section: Section 2 - Setup for the APPMAPPING project