Introduction
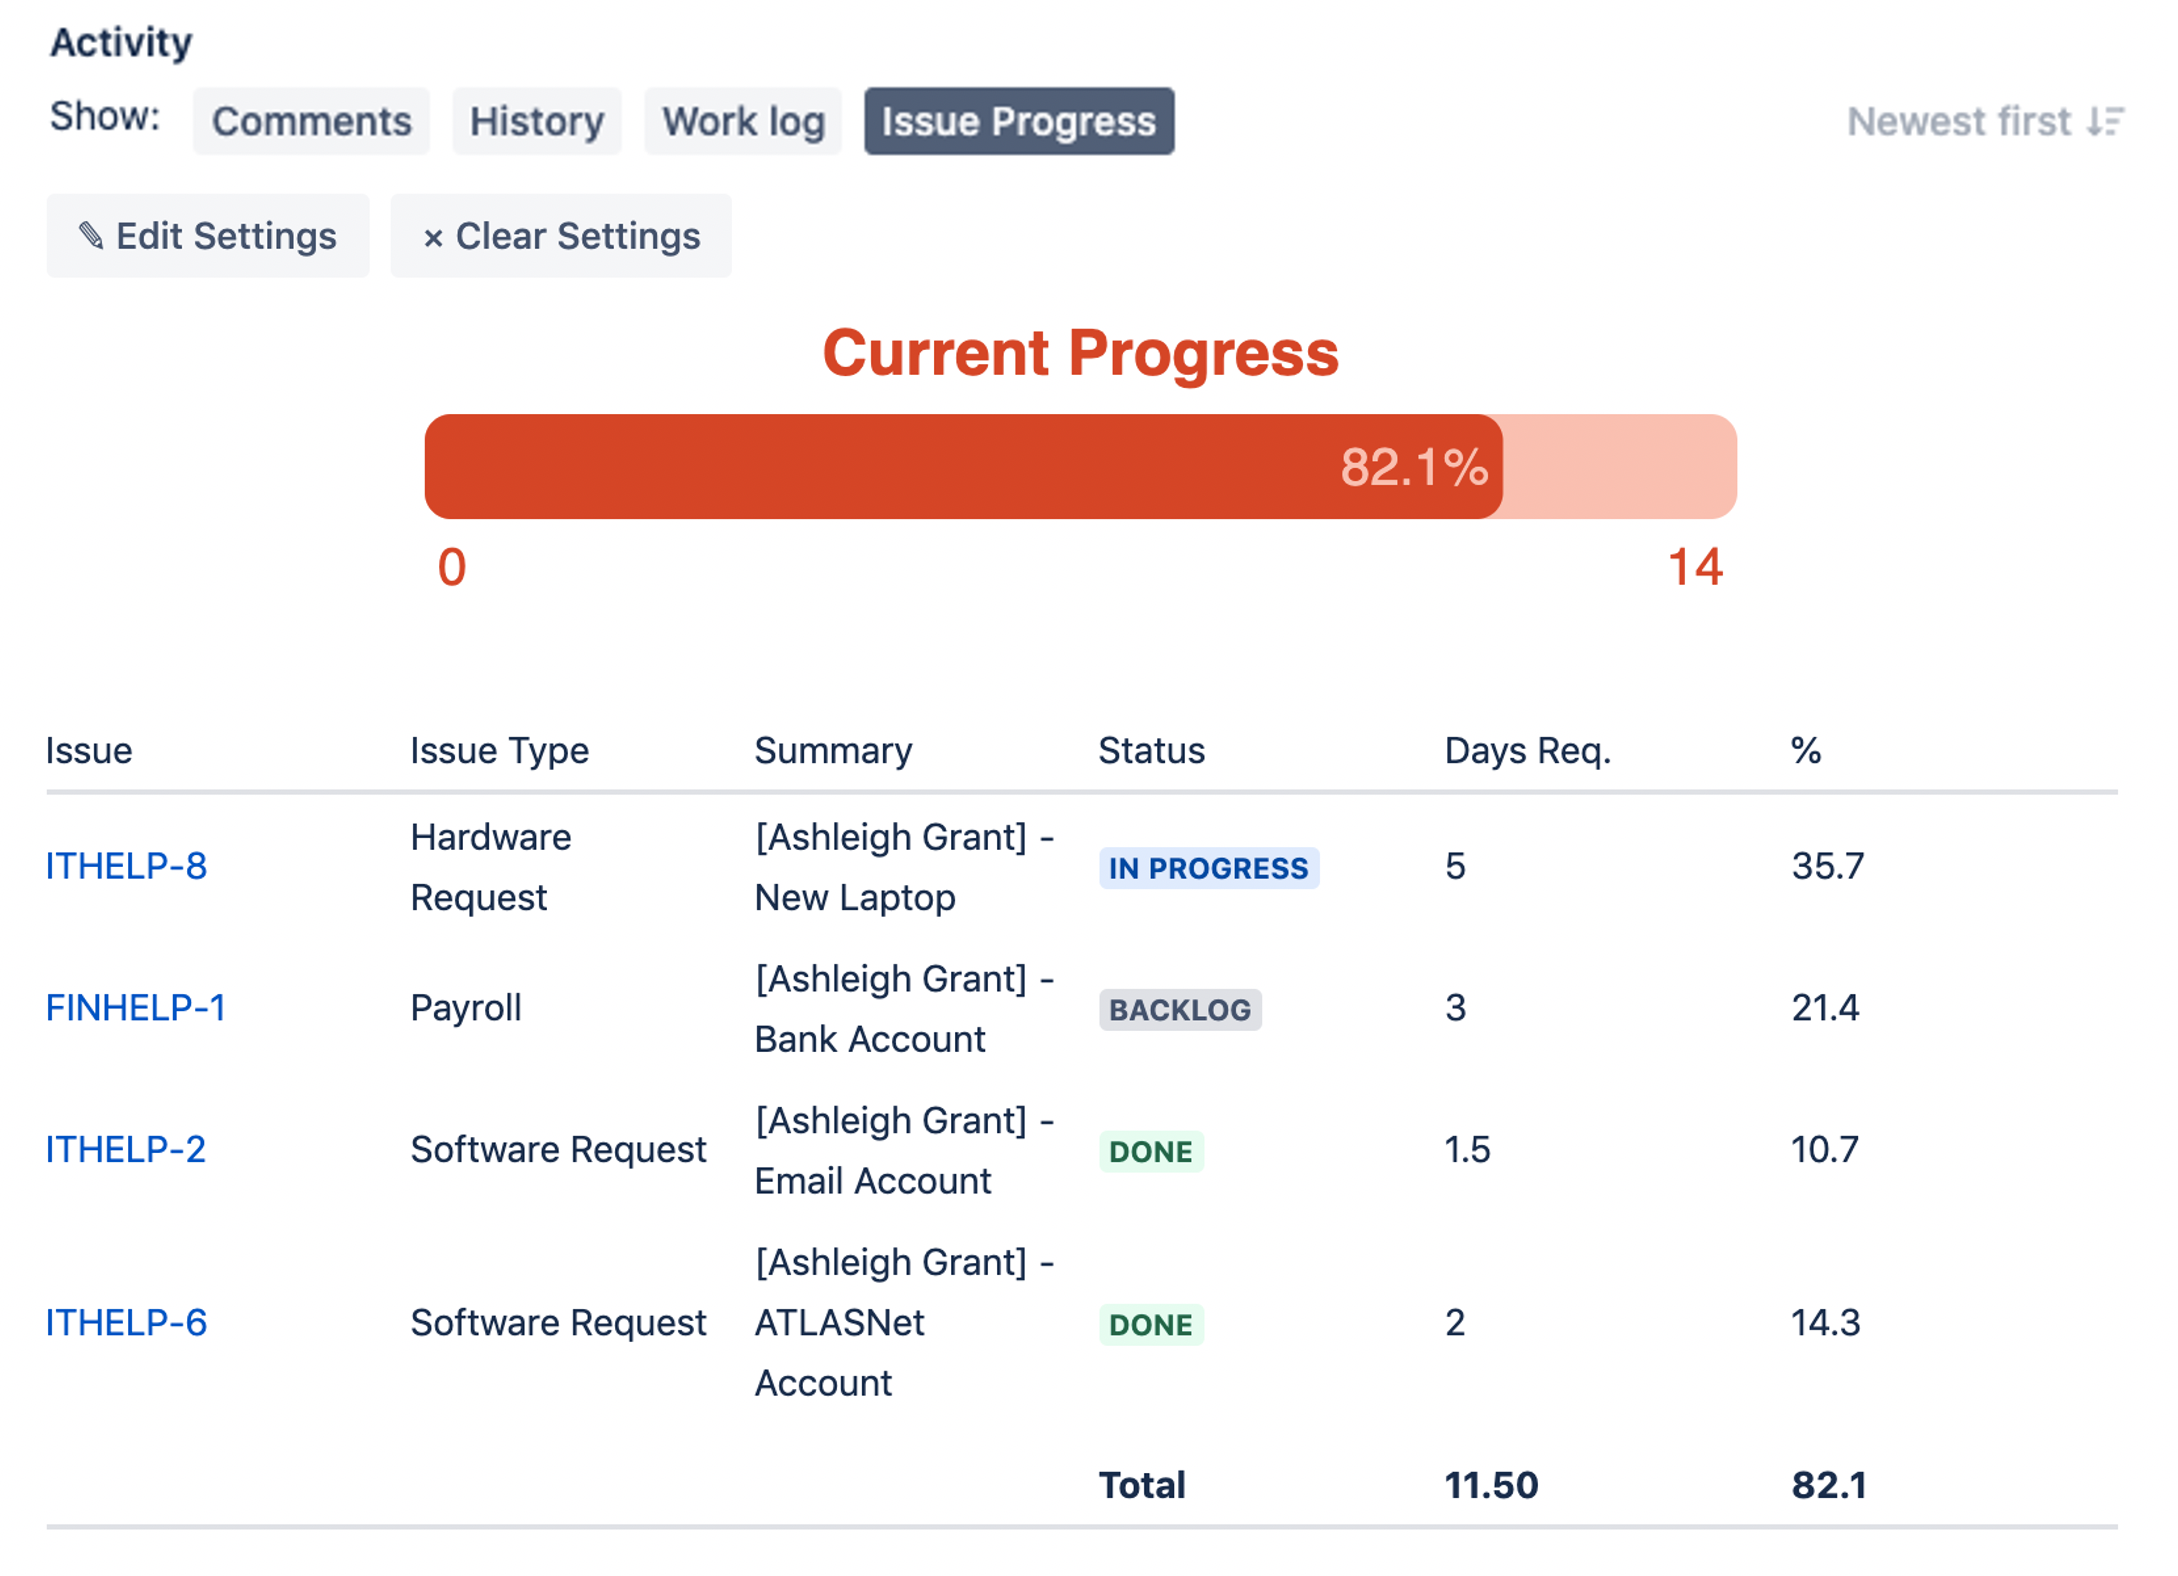
Issue Progress for Jira Cloud allows users to quickly visualise progress of an issue relative to its linked issues.
Usage
Enabling Issue Progress add-on
-
Click on Issue Progress under issue activity as shown
-
If this is your first time using the app, you will need to click on Allow access

Creating/Editing an Issue Progress report
-
Click on Issue Progress under issue activity
-
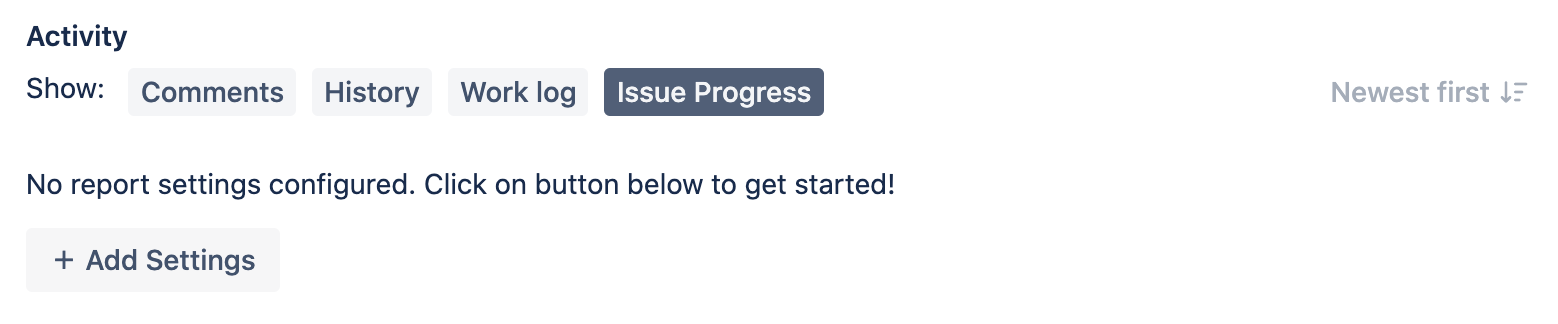
Bring up the issue progress settings panel
-
For new report, click on + Add Settings
-
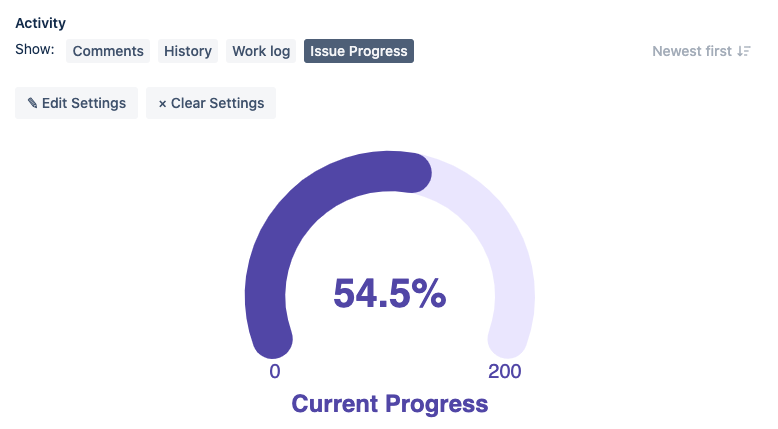
For issues with existing issue progress report, click on Edit Settings
-
-
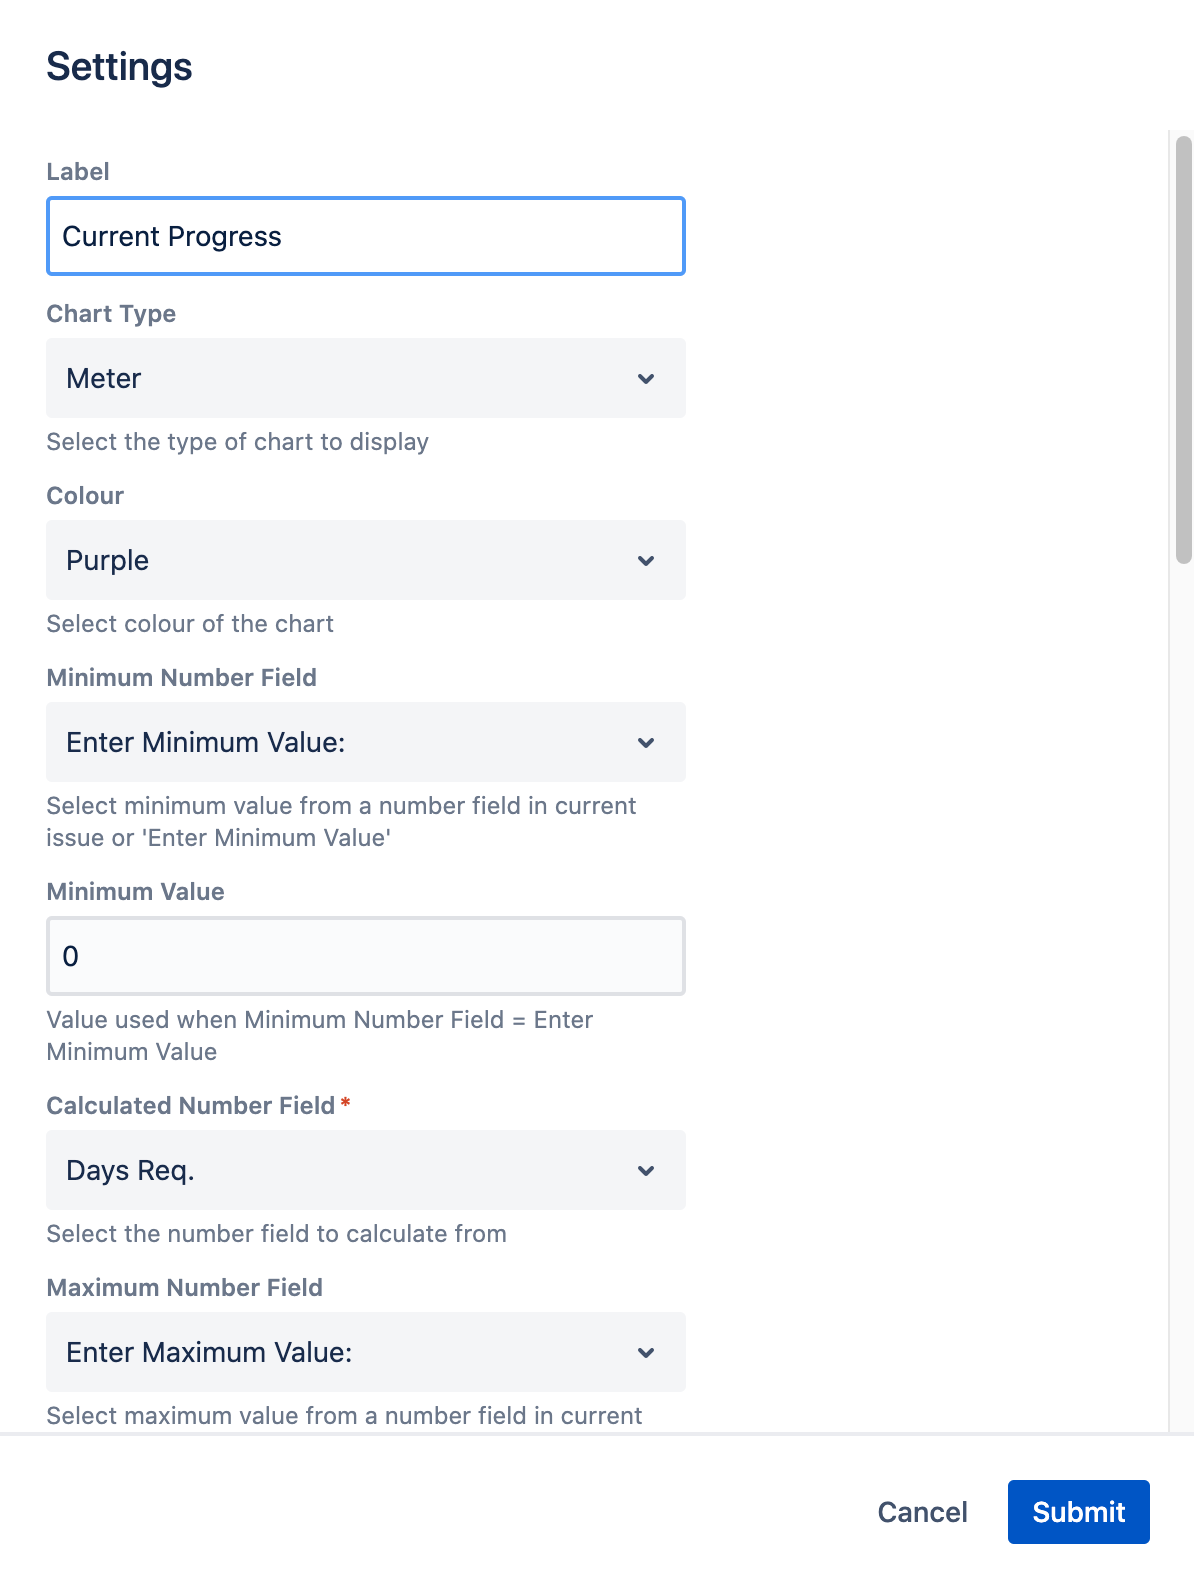
Select the desired settings (See the next section for more detail) and click on Submit
Settings configuration
|
Field Name |
Default Value |
Explanation |
|---|---|---|
|
Label |
Progress |
Enter label for chart |
|
Chart Type |
Meter |
Select the chart type to display:
|
|
Colour |
Purple |
Select the color to use for chart:
|
|
Minimum Number Field |
Enter Minimum Value: |
Select the available number field in current issue:
|
|
Minimum Value |
0 |
The minimum value to use if “Enter Minimum Value:” is selected for Minimum Number Field |
|
Calculated Number Field |
|
Select the available number field to use to use for tabulating issue progress for linked issues.
|
|
Maximum Number Field |
Enter Maximum Value: |
Select the available number field in current issue:
|
|
Maximum Value |
0 |
The maximum value to use if “Enter Maximum Value:” is selected for Maximum Number Field |
|
Calculation Type |
Current and Linked Issues |
Whether to include current issue value into calculation |
|
Linked Issue Type(s) |
|
Select the linked issue types to consider for calculating progress |
|
Issue Link Type(s) |
|
Select the issue link types to consider for calculating progress |
|
Calculation Mode |
Sum |
Select the calculation mode to use:
|
|
Only Resolved Issues? |
Yes |
Select whether all values on issue should be calculated / only resolved issues. Options are:
|
|
Show Breakdown? |
Yes |
Whether to show breakdown of issues and number value
|