Config Lookup Table
Goal
This section shows the instructions to create / edit / update / delete a lookup table.
Pre-requisites
✔️ Create a Jira Project
✔️ Jira Administrators permission
Configuration steps
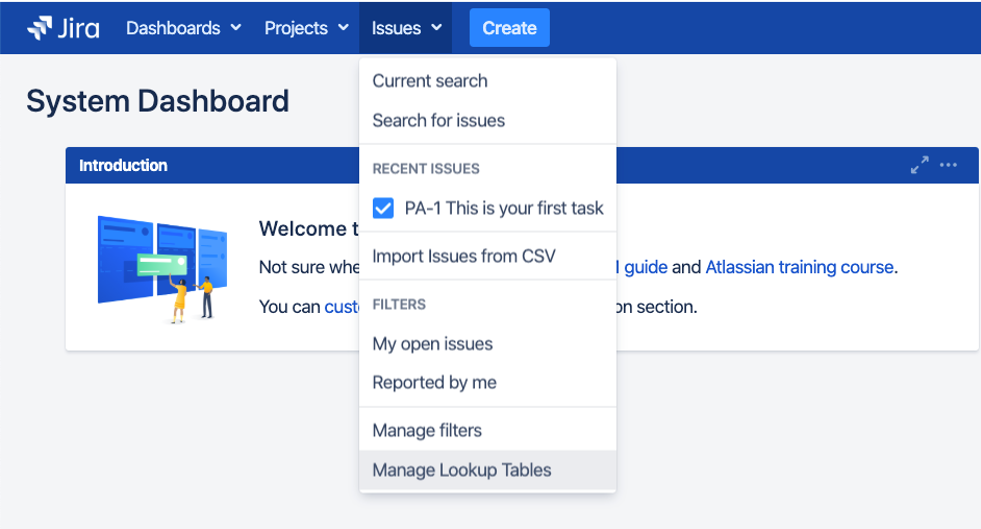
1. Go to Issues and click Manage Lookup Tables to start configuring lookup tables
2. You should see an empty page with 5 button at the top right corner of the page (Table Permission, Import Table, Add Table, Delete Table and Export Table)

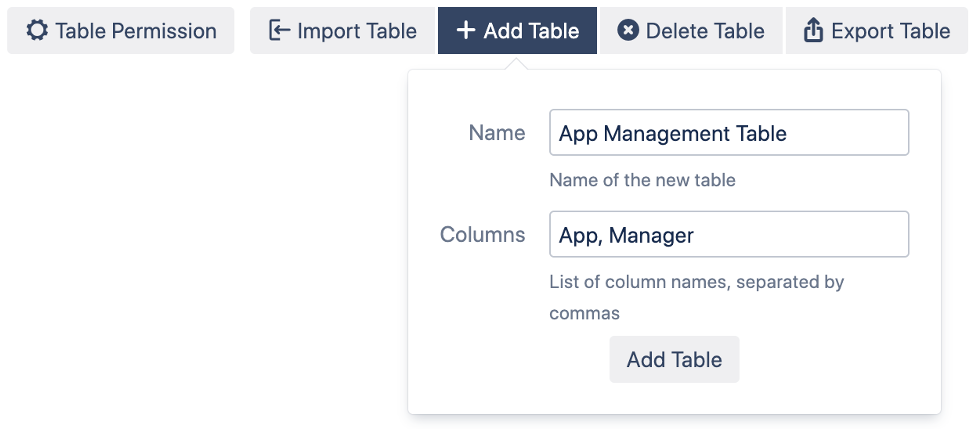
3. Click Add Table button and you should see a dialog prompting to enter a lookup table name and columns.
You can enter additional columns by adding comma (,) after each column names. Alternatively, you can always add new column after creating the table
4. Upon successfully creating the lookup table, you should receive an empty lookup table with no records

5. Now you are ready to add records into the lookup table.
It is possible to import new tables. See How to import a table into Lookup Manager
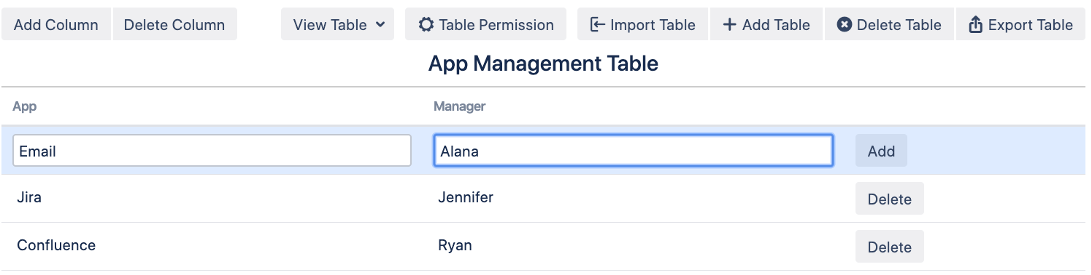
a) Adding a new record into the lookup table by entering the details and click the Add button
b) Click the Add Column button to add new columns into the existing lookup table

c) Click the Delete Column button to delete unnecessary column

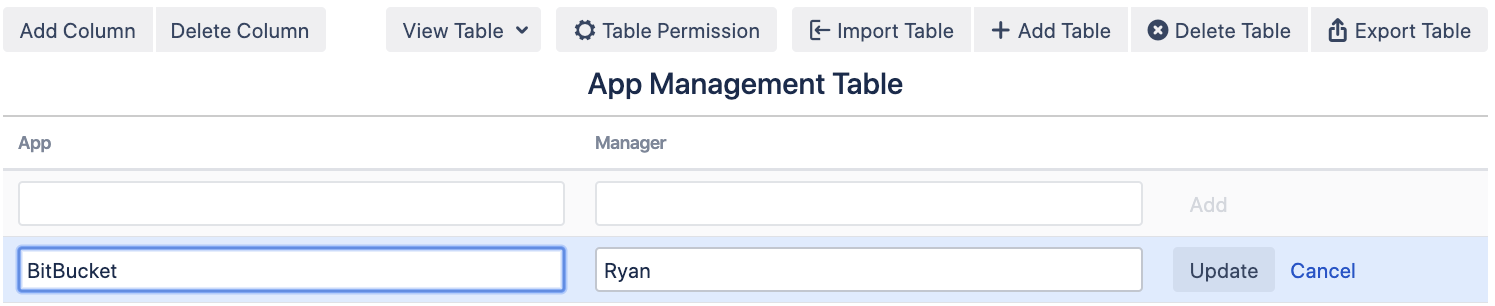
d) Editing existing record by simply clicking the record you wish to edit
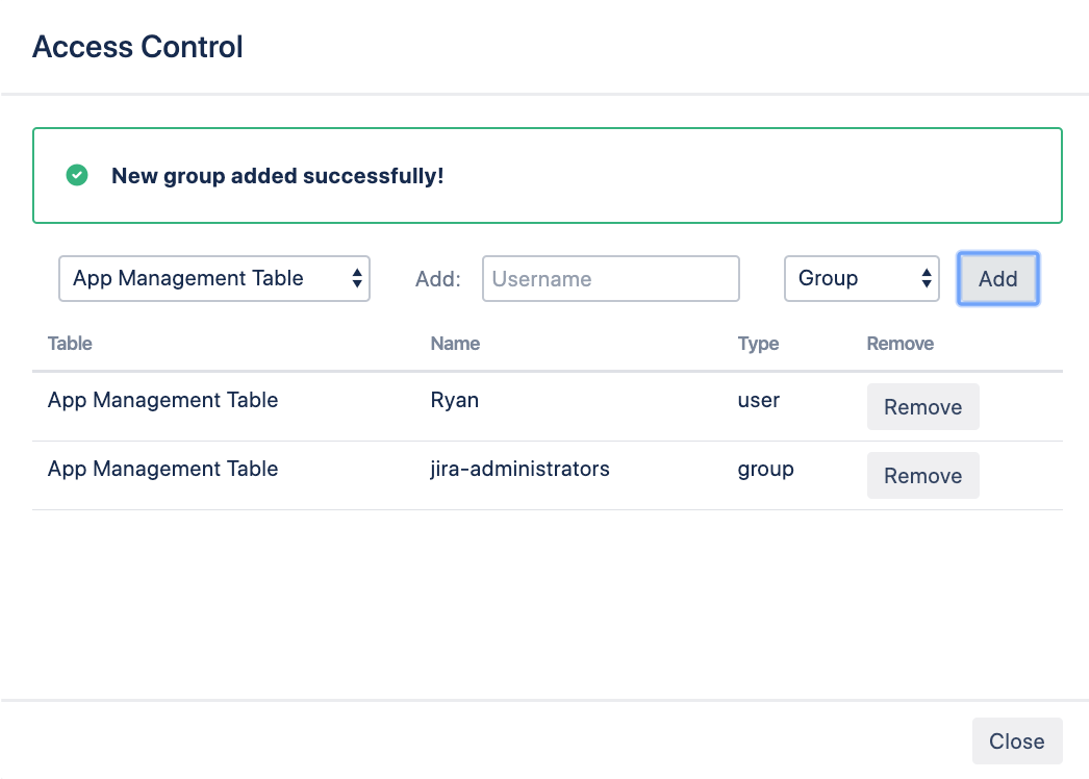
e) Assigning Permission to user or group to edit the lookup table by clicking the Table Permission Button
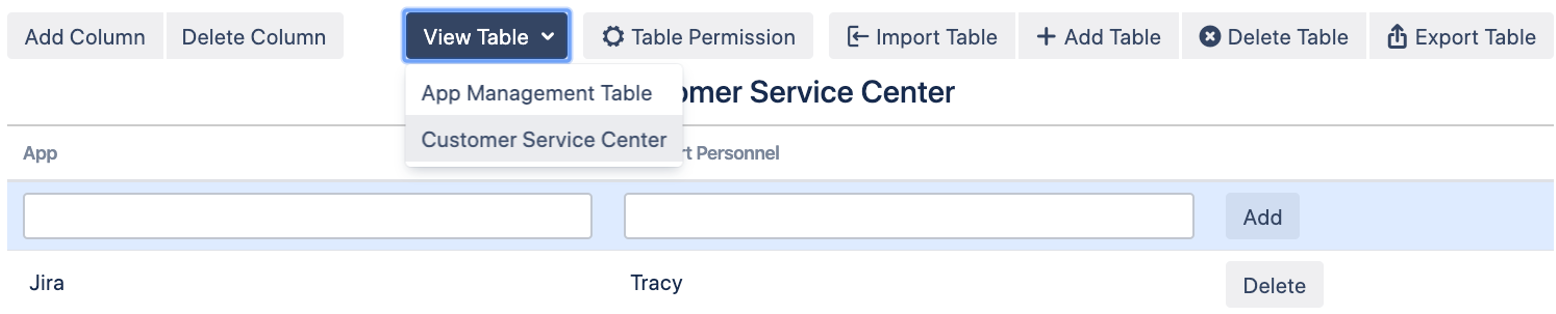
f) Click on View Table button to view/edit other table
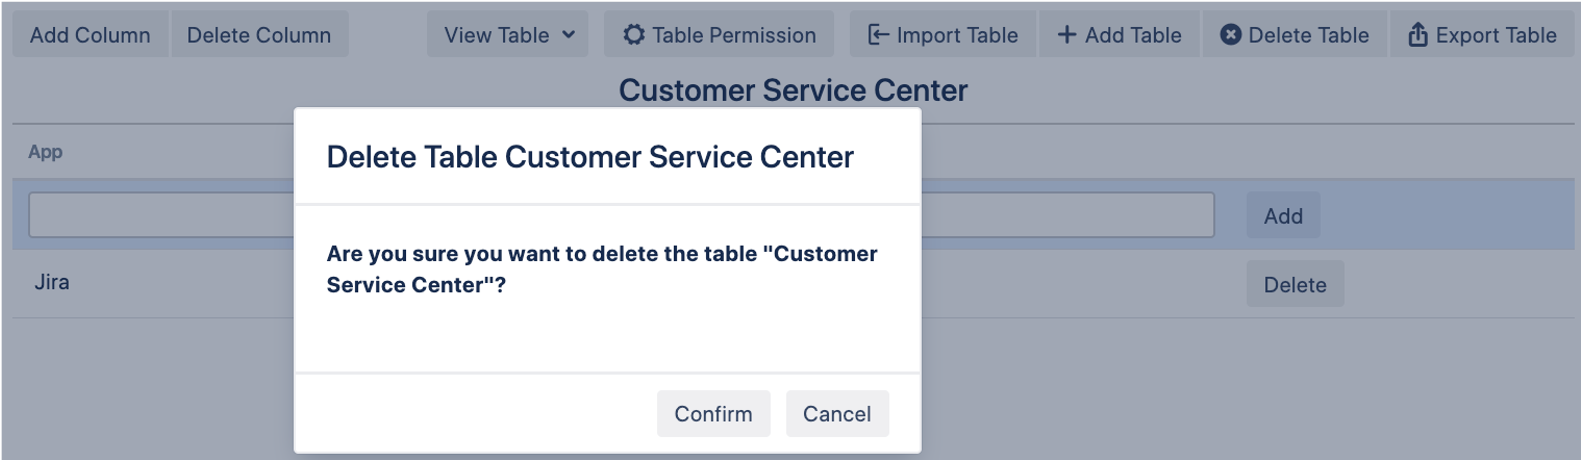
g) Click on Delete Table, if you do not need the lookup table anymore.
Learn More
Configure the workflow to use the Lookup Manager Post Function.
Configure the component to use the Automation-For-Jira.
Configure the action to use Jira Service Desk Automation.
Import a CSV file to overwrite an existing table in Lookup Manager
Import a CSV file to append data to an existing table in Lookup Manager.