Configuring Liquid Gauge Gadget
Adding Liquid Gauge Gadget to a dashboard
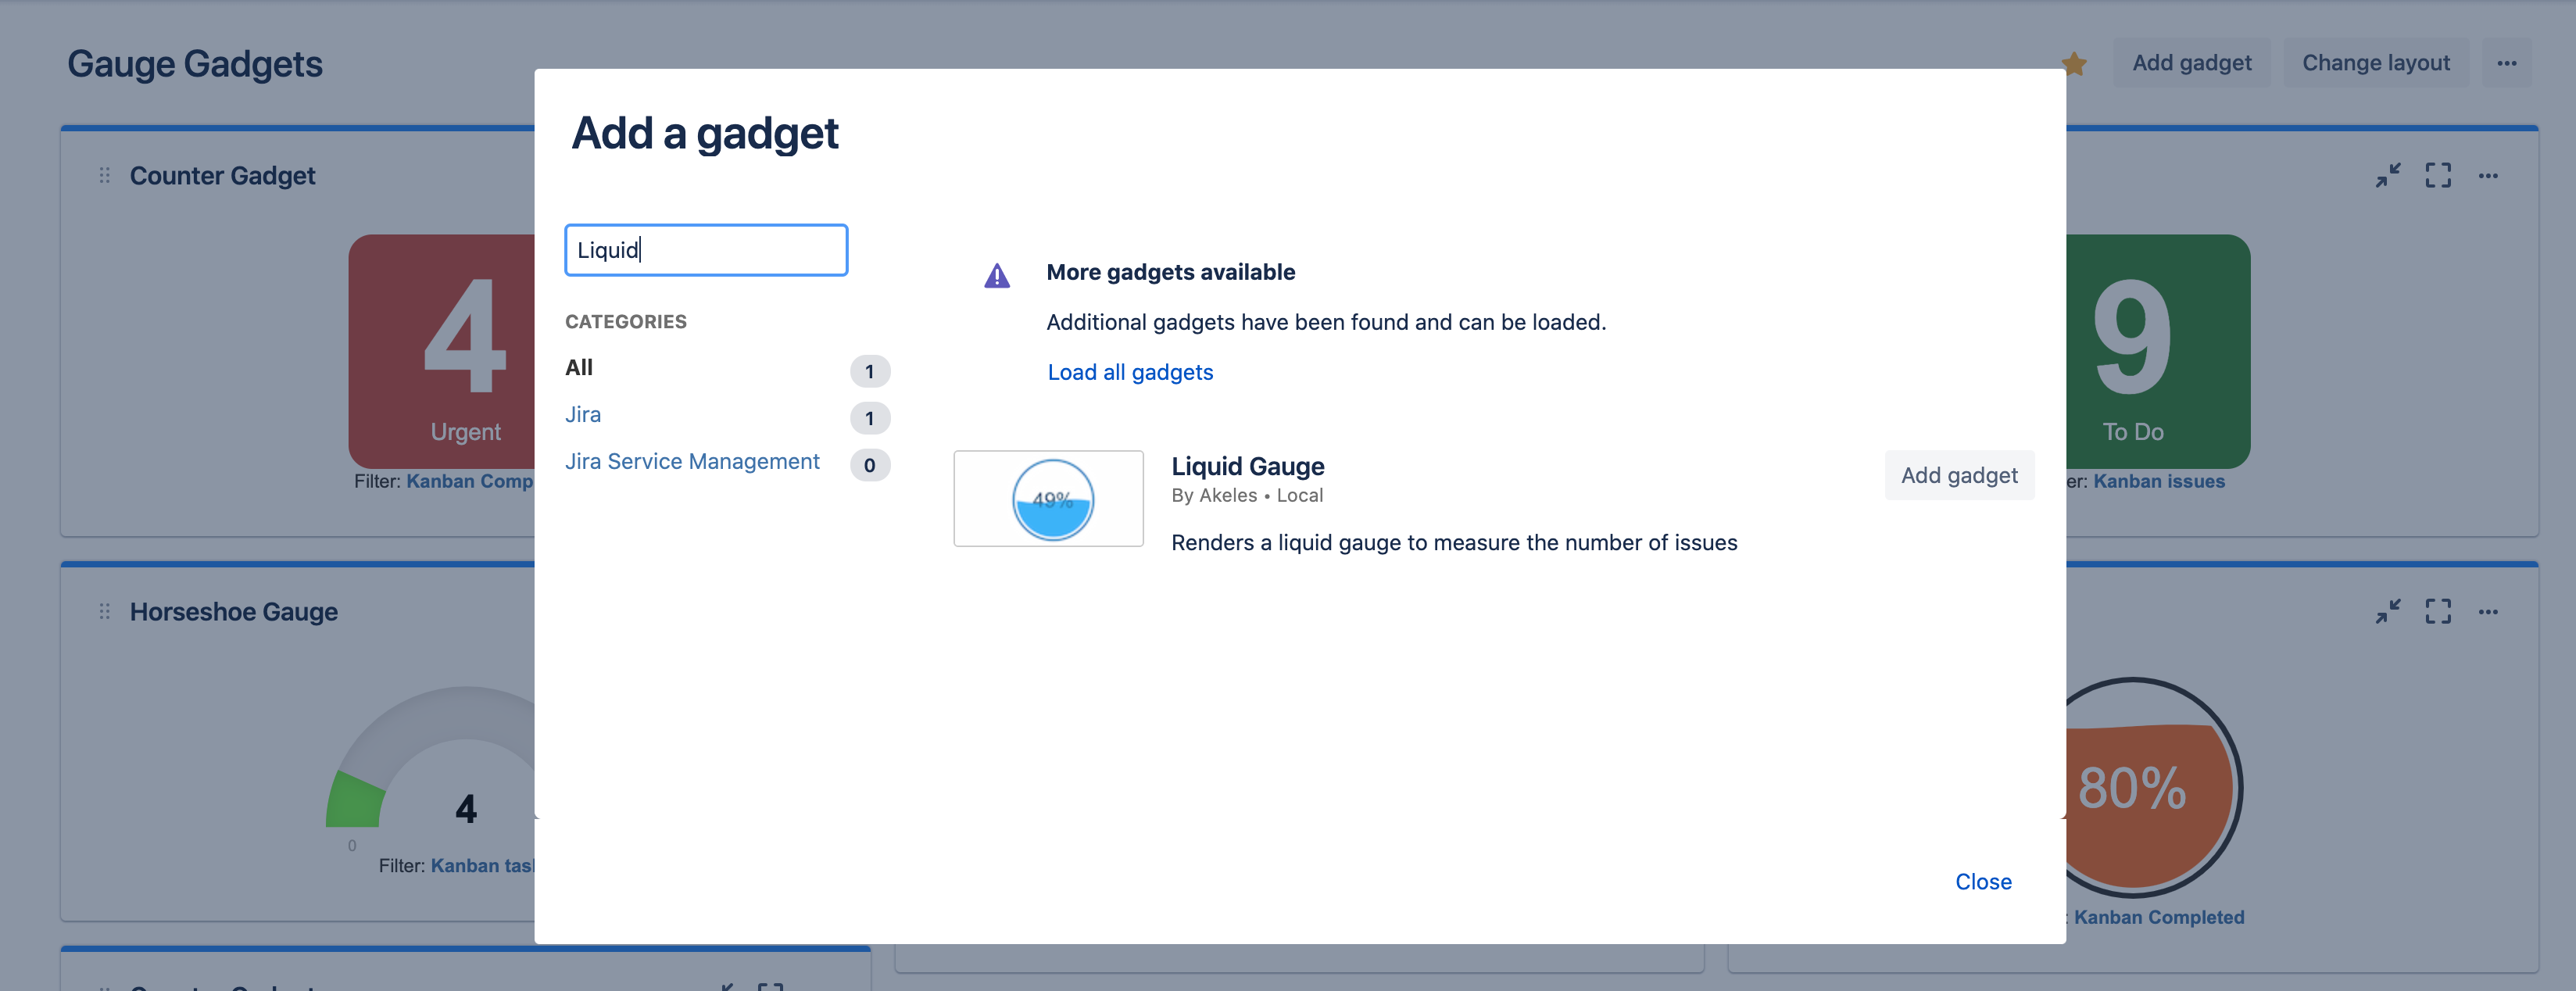
Go to a dashboard and click on Add gadget.
Search for Liquid Gauge and click on Add gadget next to it.
Liquid Gauge Gadget configuration
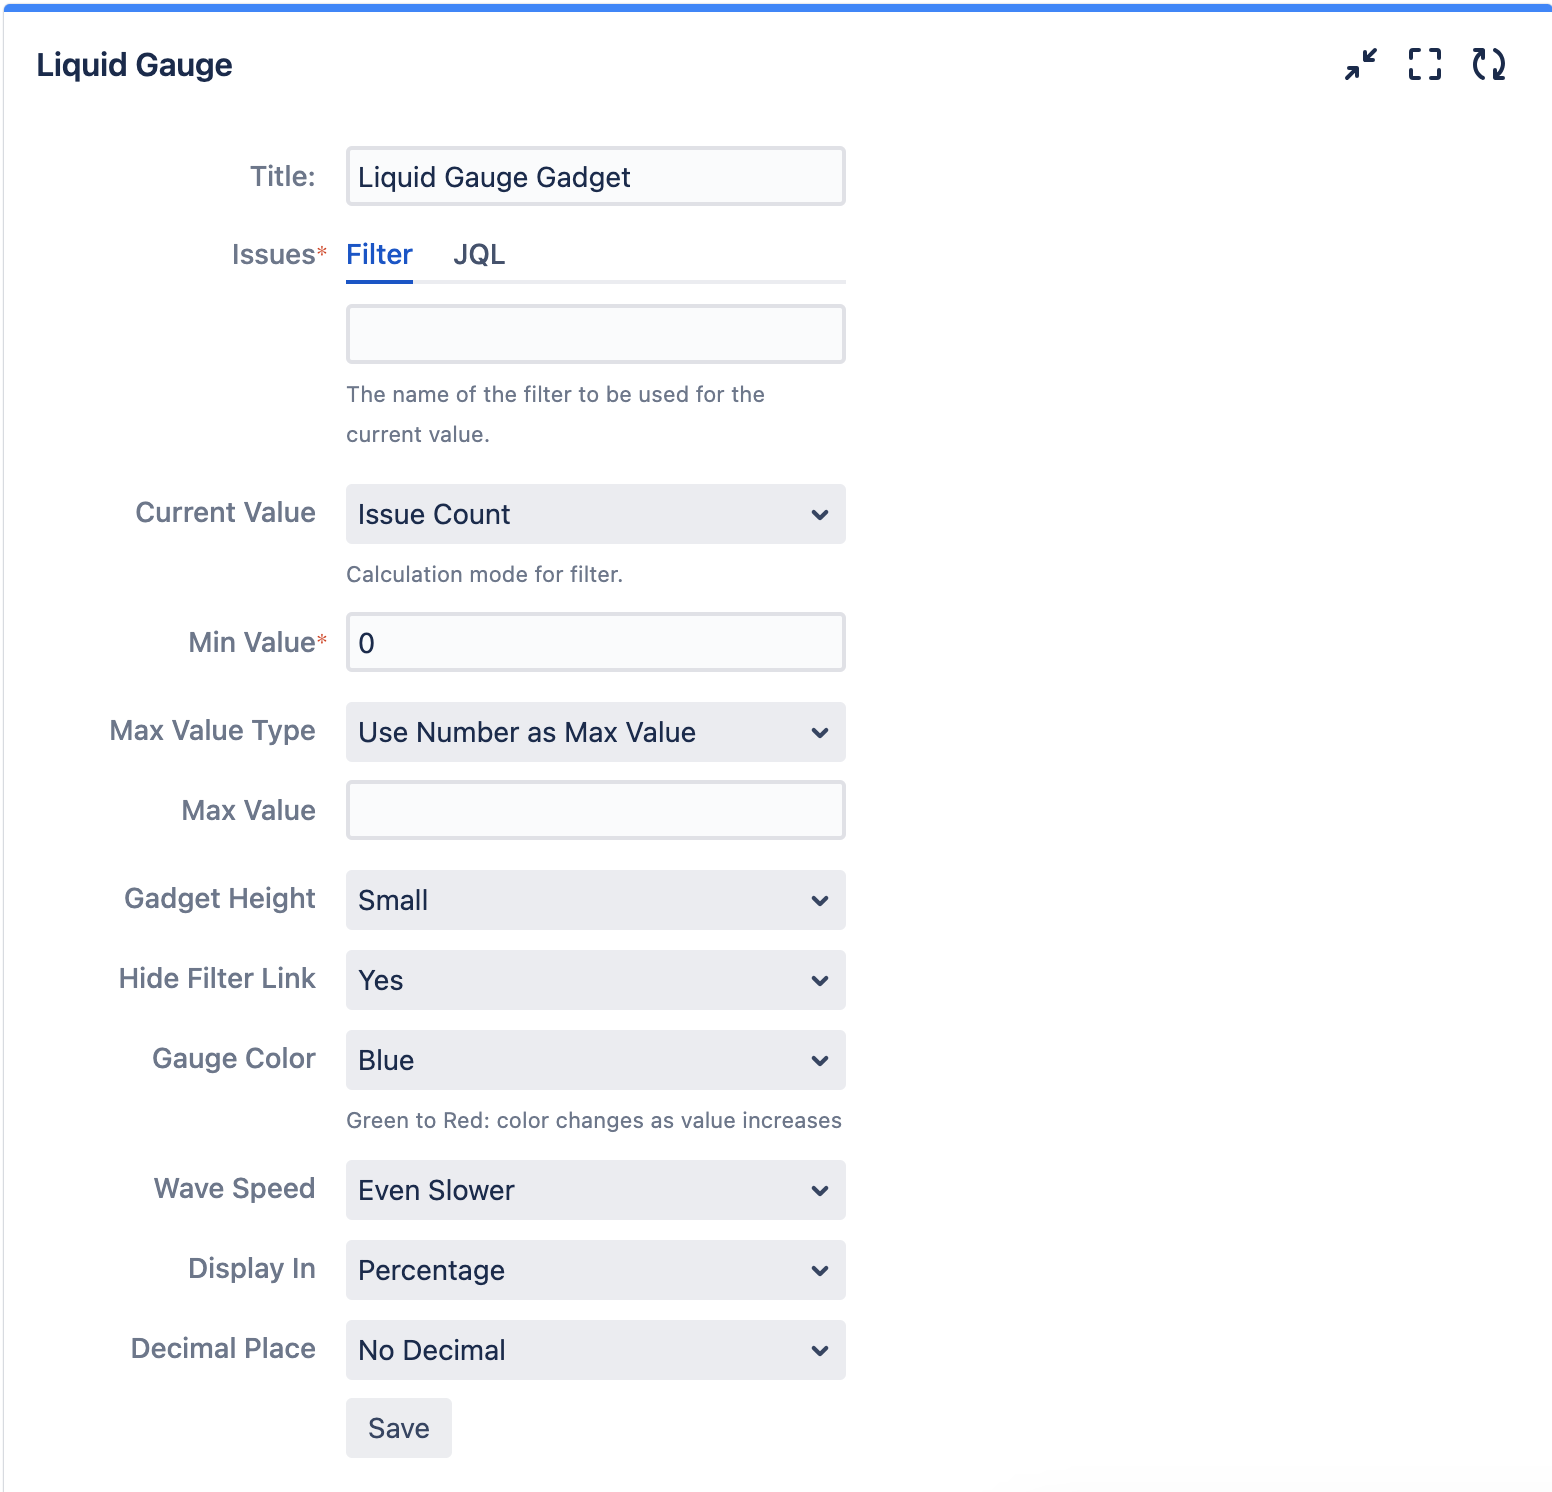
Settings | Description |
|---|---|
Title | The title of the gadget |
Issues | Filter or JQL can be used to search to display the number of issues shown in the gauge gadget |
Min Value | The minimum value of the gauge |
Max Value Type | The type of maximum value for the gadget
|
Max Value | The maximum value of the gauge |
Max Filter | The filter in which the number of issues will be displayed in the gauge as the maximum value |
Gadget Height | The height of the gadget and gauge will scale based on the height of the gadget |
Gauge Color | The colour of the liquid gauge and there is option to change liquid colour based on the level of the gauge |
Wave Speed | Animation speed for the wave in liquid gauge |
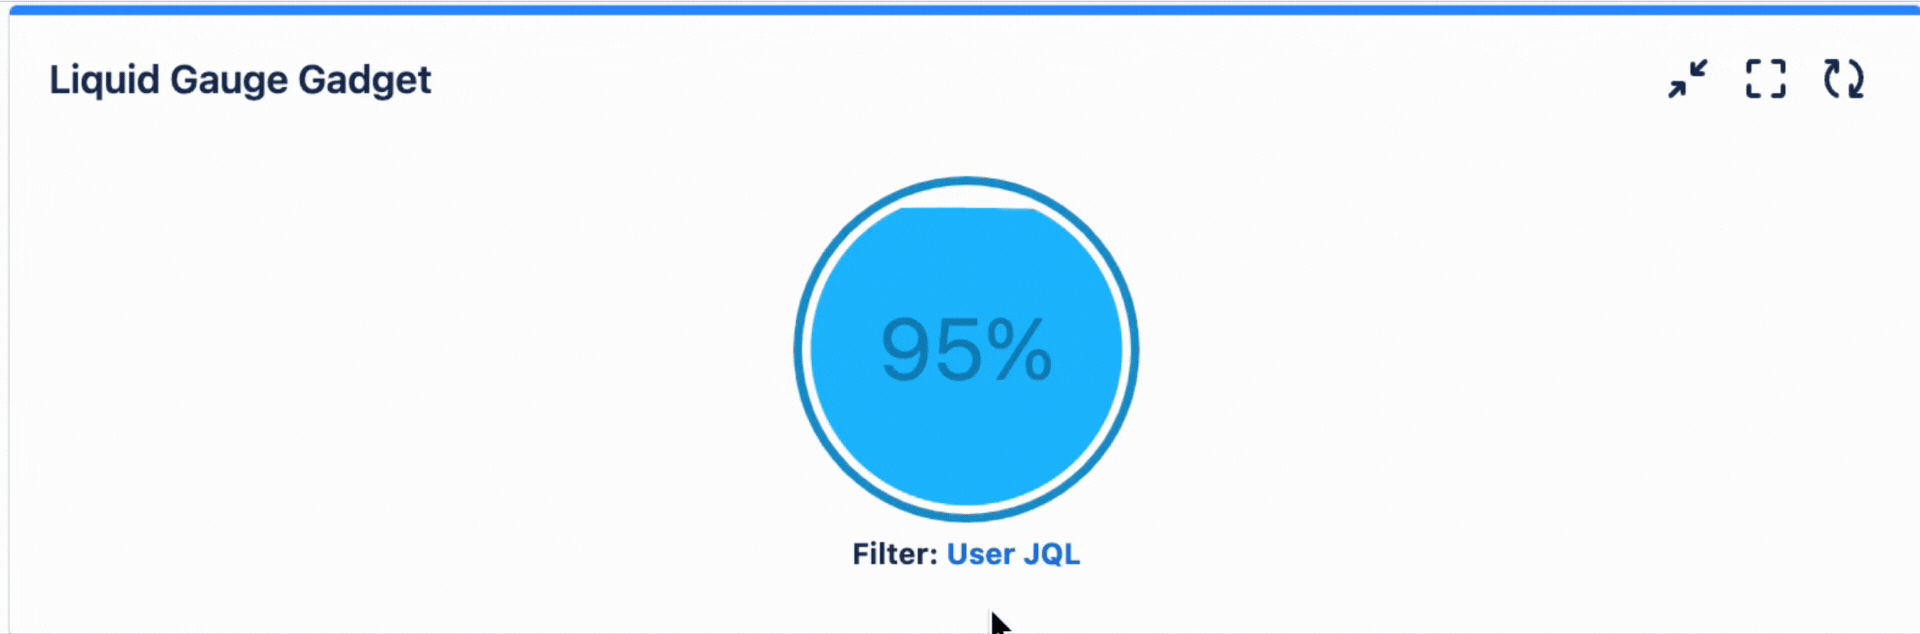
Display in | Display in percentage of the gauge or the number given in the Value Filter |
Decimal Place | How many decimal to be display in the gauge |
*BONUS TIP* Hover over “User JQL” to see your JQL Query