Managing Attachment Housekeeper Policies
Creating a Policy
There are 2 types of policies in Attachment Housekeeper
Global policies are available for ALL projects to use, and can only be created by Jira admins.
Project policies are only available for a specific project, and can be created by both Jira and project admins.
Navigate to the page to create a policy.
To create a global policy:
Login as a Jira administrator
Go to Administrator > Issue Archiver
Go to the Housekeeping Policies page
Then click on Create New Policy
To create a project policy:
Login as a Jira or project administrator
Go to the project settings page for the project you want to create a policy for
From the project settings sidebar, click on Housekeeping Policy
Click on ⚙️ Actions > Create Project Policy
Add in the policy name and rules. If more rules are needed, add a new rule using the Add New Rule button. An attachment will be marked as long as it satisfies any rule in the policy.
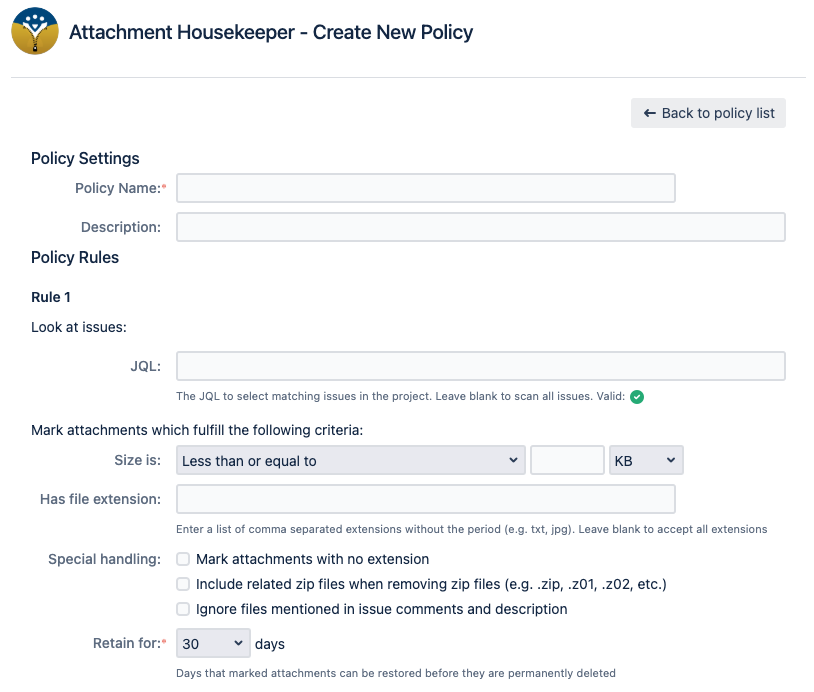
Explanation of fields:
Field | Description |
|---|---|
Policy Name (required) | The name of the policy for display. |
Policy Description | The description of the policy. Use this to better describe the policy for other users. |
Rule field | Description |
JQL | The JQL used to get a list of issues to look at. If blank, all issues in the project are looked at. Note that there is no need to specify the Jira project in the JQL as the policy will automatically filter for issues within the linked project already. If you need some guidance on JQL, check out Useful JQLs for selecting issues for housekeeping |
Size | The file size limit that the attachment must fulfill. If blank, no comparison is done and all attachments are considered a match. |
Has file extension | A comma separated list of file extensions that the attachment must have. If blank, any extension (including no extension) is considered a match. |
Mark attachments with no extension | If checked, any attachment without an extension will be marked. |
Include related zip files when removing zip files | If this is checked AND “zip” is included in the file extension criteria, then other similar zip file extensions like .z01, .z02 will also be marked. |
Ignore files mentioned in issue comments and description | If checked, attachments mentioned in either their corresponding issue’s comments or description will be skipped and NOT be marked |
Retain for (required) | The number of days a marked attachment will be kept until it is permanently deleted. Until then, it is possible to recover these attachments. |
Note that an attachment must match all the above criteria of a rule in order to be marked.
Once you are ready, click on the Create Policy button
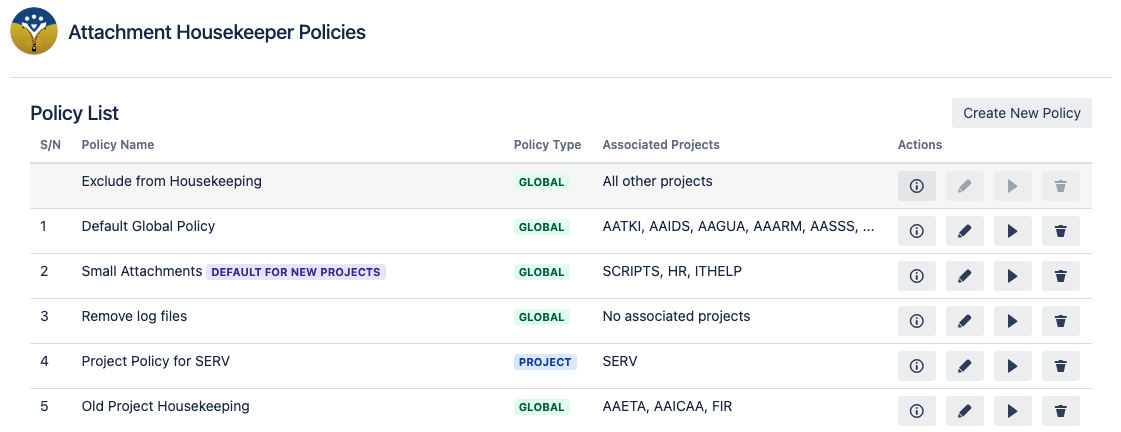
You will be able to see the newly created policy in the Housekeeping Policies page
Options
There are 4 action buttons possible for each policy
Info - for reviewing the details of the policy
Edit - for editing the policy
Run - for trigger a run of the policy on the associated projects
Delete - for deleting the policy
Exclude from Housekeeping is a System Policy which cannot be deleted. Hence some of the buttons are disabled.

Editing a Policy
Locate the policy you would like to edit.
If you are a Jira admin:
Go to Administrator > Issue Archiver
Go to the Housekeeping Policies page
Click on the Edit 🖊️ icon under Actions to edit the policy’s information
If you are a project admin, you can only edit project policies that belong to projects you are an admin of
Go to the project settings page for the project whose policy you want to edit
From the project settings sidebar, click on Housekeeping Policy
Click on ⚙️ Actions > Edit Project Policy
If the Edit Project Policy option is not there, you will have to link the project policy to the project first
Edit the policy name, description and rules. You can also add more rules to the policy if needed.
Once you are ready, click on Save Policy to save your changes.
Deleting a Policy
When a policy is deleted, all projects linked to it will be unlinked. You will have to link each project to another policy if needed.
Only a Jira admin can delete policies.
Login as a Jira administrator
Go to Administrator > Issue Archiver
Go to the Housekeeping Policies page
Identify the policy which is not needed anymore and click on the Trash icon under Actions
Confirm the deletion of the policy

Designating a Policy as Default for New Projects
Only a Jira admin can designate a policy as the default for new projects
A global policy can be designated as the default policy for new projects. Any newly created projects will be automatically linked to this designated policy.
This does not change any existing project to policy links, so your existing projects will still use the policy they were using.
It is easier to implement an attachment housekeeping policy for new projects with the policy shared with the users from the start. This is how this feature can come in handy.
For existing projects, it might be more challenging to review all the existing issues.
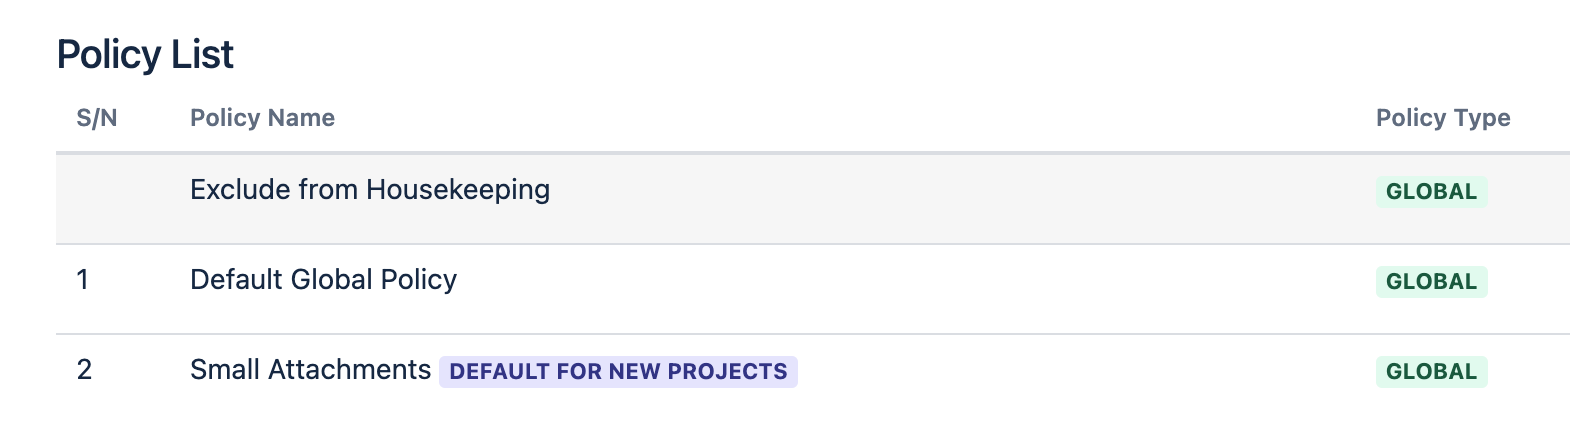
You can identify this special global policy by the purple lozenge with the text “Default for new projects”
Login as a Jira administrator
Go to Administrator > Issue Archiver
Go to the Housekeeping Policies page
Click on the Info
 icon under Actions for the policy you want to set as the policy for new projects
Click on Set as policy for new projects
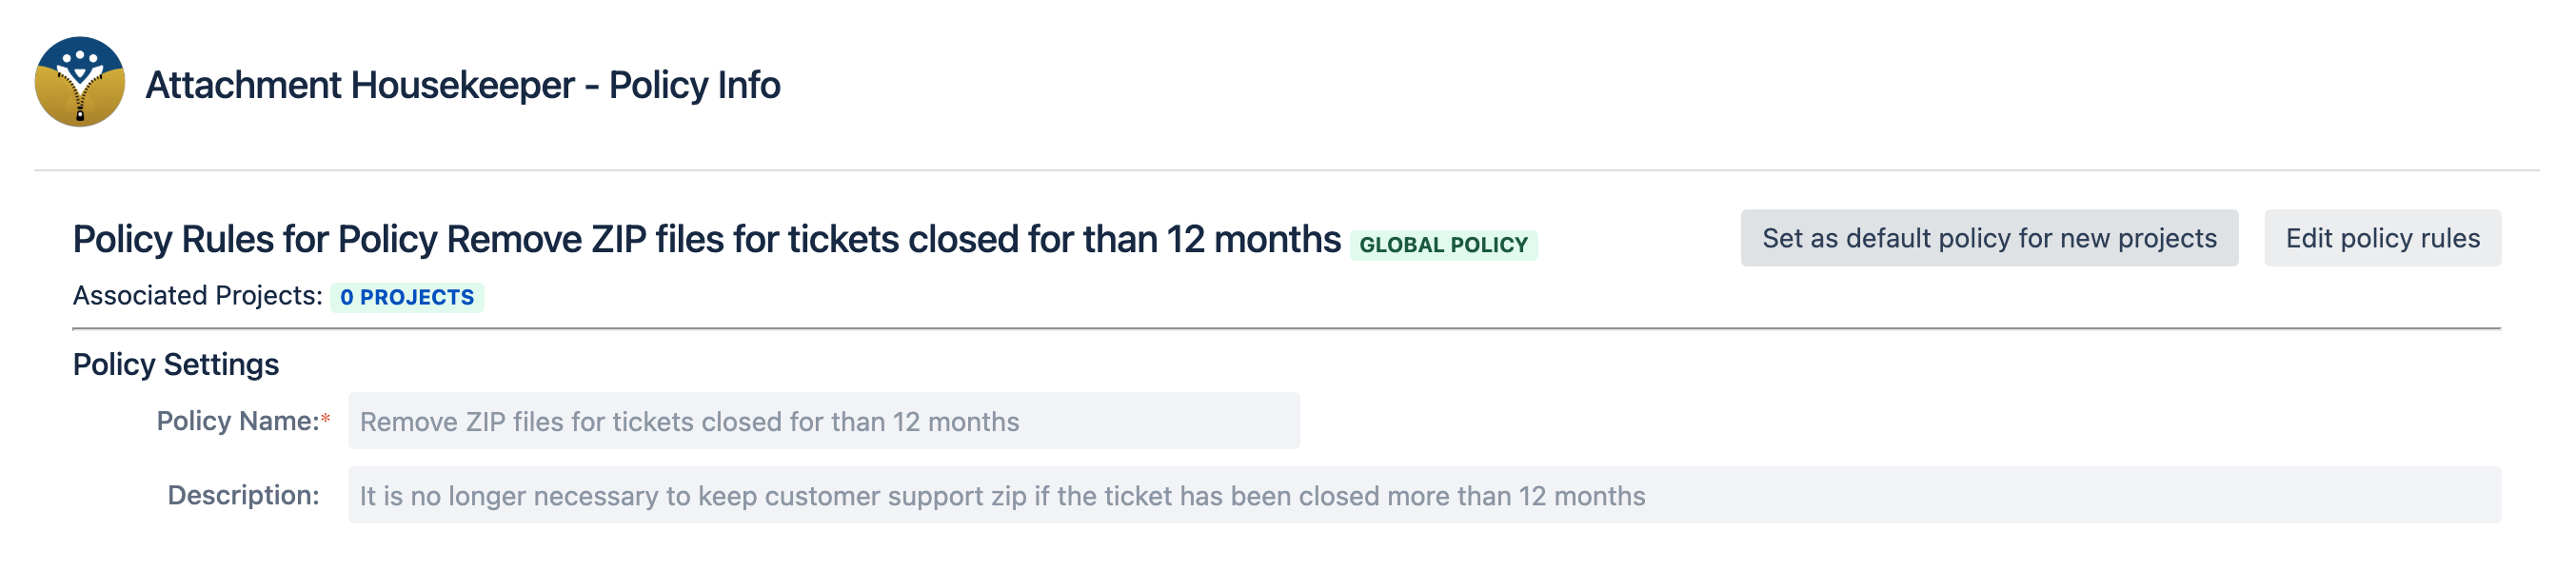
Click on the Confirm button to confirm the selection.
